
Infrared black and white makes the unseen pop. A Two Minute Beach Read.
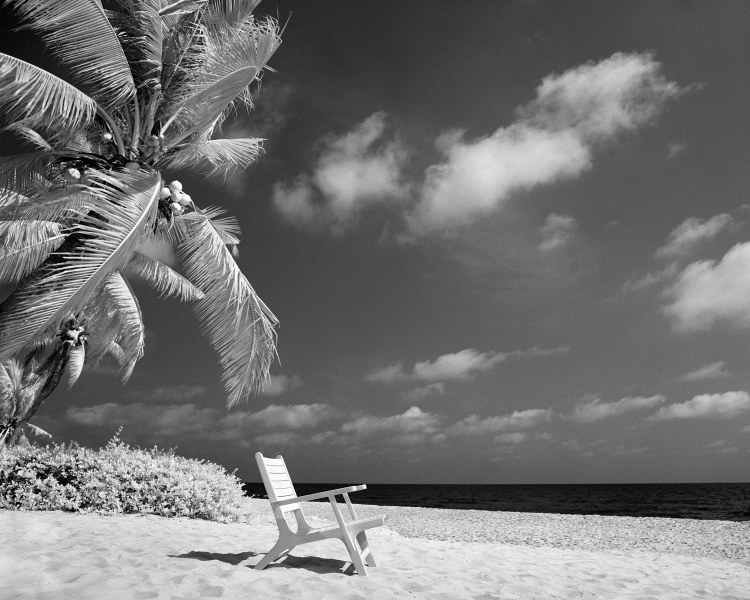
I LOVE shooting infrared black and white photos and the effect can be stunning if not surreal. This is a good example of how the process works. You may note several things from this photo:
- The sand and beach chair render normally.
- The sky is darkened, similar to what you would get from a dark red filter.
- The water is black…water is not reflecting infrared light at all.
- Foliage is nearly white. Foliage will reflect infrared light in varying shades depending on the plant and the angle to the sun.
I try to look for scenes with all of these aspects, and particularly with some of the foliage in shade.
I use an R72 filter and rate the Rollei IR 400 film at ISO 12 with the filter on. I am developing in a compensating developer like Diafine to get a base film speed of 800 (getting an extra stop…e.g. a faster shutter speed, can be important for sharpness.) I have used Microphen and Xtol as well with similar results.
The process broken down:
- Compose the picture with camera on a tripod and lock it in.
- Calculate the exposure. In this case, with full sunlight, I used f8 (for depth of field) and a shutter speed of 1/60. My Sekonic light meter works fine set to ISO 12. The built-in light meter in the Mamiya 645Pro is equally good.
- Put the R72 filter on the lens. At this point you can see nothing through the viewfinder. Shift the focus using the IR marking on the lens.
- Click the shutter (and preferably use a shutter release cable!) Rinse and repeat. Bracketing might be useful if you are new to the process.
Infrared is a fun divergence from traditional black and white and may require some trial-and-error to get it right. So happy shooting!
- gregory gammon / www.vinylfye.com

Leave a comment